
 Marilyn Monroe was right. Diamonds are a girl's best friend....especially around Valentine's Day! Plus, it's always fun to come up with an excuse to add BLING to an already colorful wreath. Here's how you can do it too!
Materials:
10 yards fuchsia tulle
10 inch white Styrofoam wreath
1 package Martha Stewart Dimensional Diamond stickers
1 package Jolee's All That Bling stickers (my new favorite thing)
12 inch wooden letters
sandpaper
white primer
silver metallic spray paint
hot glue
$12 in nickels
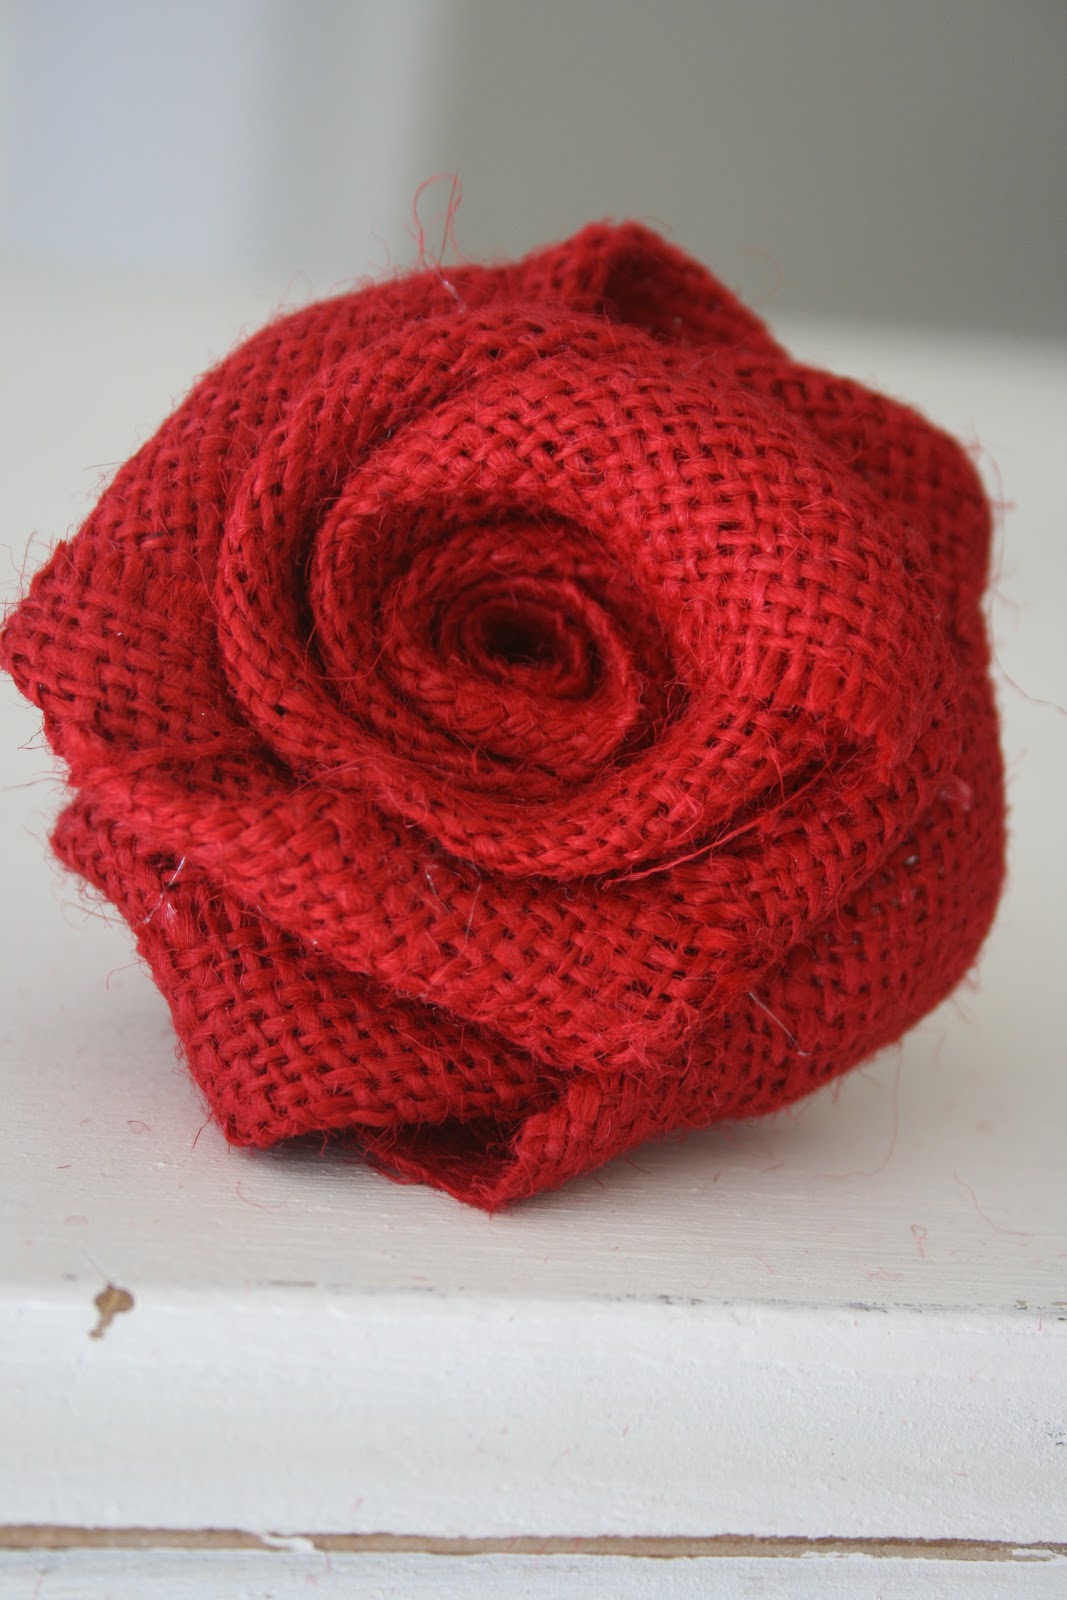
Tulle rosettes


Step 1: With the two pieces of tulle, roll it to form the center of the rose. Add a dab of hot glue to hold it in place.

Step 2: While pinching the base with your left hand, hold the length side of the tulle and begin twisting and looping it around the center of the rose. Add glue when the rose begins to form. Remember to glue low so the dried glue doesn't show.

Step 3: Keep twisting and gluing with every few twists of the wrist.

Step 4: When you come to the end of the tulle, add a thin strip of glue.

Finished product!

But it's so much better with the bling!
Putting it all together

Step 1: Wrap the wreath with fuchsia tulle to help hide any white spots when you glue the flowers.

Step 2: Add a loop of tulle to the back of the wreath for hanging.

Step 3: Place the larger roses on the wreath first. This helps balance the wreath out and makes the placement of the smaller roses much easier.

Wooden Letters

Sand

Prime and paint

Lay out the nickels to make sure they all fit.

Glue them in place. Don't worry, the guy at the bank said it isn't defacing currency to glue Thomas Jefferson to wooden letters, and they'll pop right off if you ever need a few extra cents for the ice cream man. :)
Hang it and LOVE it! This would be super cute in a little girl's room all year round.
Have fun!
~ Cindy Jane


