Showing posts with label Topiary. Show all posts

Wednesday, July 25, 2012

Weekend Pajama Party: Tulle Rosette Topiary

You might recognize this topiary from my friend Katie's baby shower that I posted a few weeks ago. {You can see it HERE.} It goes along with THIS matching wreath.  I love how soft and girly  it turned out.  Here's how I did it!
 I made the rosettes using THESE instructions and then tucked a piece of light green tulle behind the rosettes to add just a touch of contrast.  {Using pearlized corsage pins adds a fancy touch.}
 I made a variety of roses by varying how tight I wrapped the tulle.  I like the bigger rosettes for the look of this topiary, plus the bigger the roses, the fewer you have to make.
I used this cute box I got at Tai Pan a few months ago and painted it cream. 
Next, I wrapped some tulle around the stem and tied a bow around the top. 
Finally, I pinned green tulle at the base to cover the Styrofoam bottom.
Super easy and so beautiful!  
Another fun version I can't wait to make is a red one and add some bling for Christmas or Valentine's Day!  I'm feeling a Pajama Crafting Day coming on already!  :)

Have fun making the world a cuter place!

~ Cindy Jane

Tulle Rosette Tutorial


These tulle rosettes are SO easy to make and can be used in a variety of projects like this wreath and this topiary.  Here's how you can do it too!
I cut tulle into 3 - 4 inch strips....lots and lots and lots of strips!  The easiest way to do it is to fold the tulle {lengthwise} into fourths, kind of bunch it together, and then cut. 
You'll end up with a strip that is about 2 yards long and 3 - 4 inches wide.
 I'm right handed, so I held onto the tulle with my left thumb and started wrapping it. 
 Then I loosely turned it until it looked like this...it took about 5 wraps.
Next, I formed the "bud" of the flower.  I gently unwrapped it from my fingers and held onto it with my thumb.  Then I wrapped the tulle around one side a few times, and then gradually turned it like I was making a ball of tulle...because really that IS all you're going to do! 
See!  I told you it was simple.  :)
The only tricky part is if you need a lot of flowers, so it makes a perfect tv project. 
Just remember, the tighter you wrap the tulle, the smaller the rose and vise versa.  I like to have a variety of sizes when I do projects like this.
 When you've wrapped all the tulle, put a corsage pin in the center and you're done!

Have fun making these gorgeous roses &
making the world a cuter place!

~Cindy Jane


Monday, July 9, 2012

Weekend Pajama Party: Sugar & Spice Baby Shower!

I was honored to throw a baby shower for one of my favorite people in the world last weekend!  Katie is having a baby girl in September and wanted a soft and delicate feeling to the decorations and theme.  She decided on "Sugar and Spice" with an emphasis on sugar!  You can't go wrong with that. 
This cotton candy inpspired wreath was hung on the front door.  The rosettes were made from tulle (lots and lots of tulle) and held in place on a styrofoam wreath with corsage pins.  There was zero gluing involved, which I loved.  Click HERE! for a tutorial on my new favorite wreath.  :)
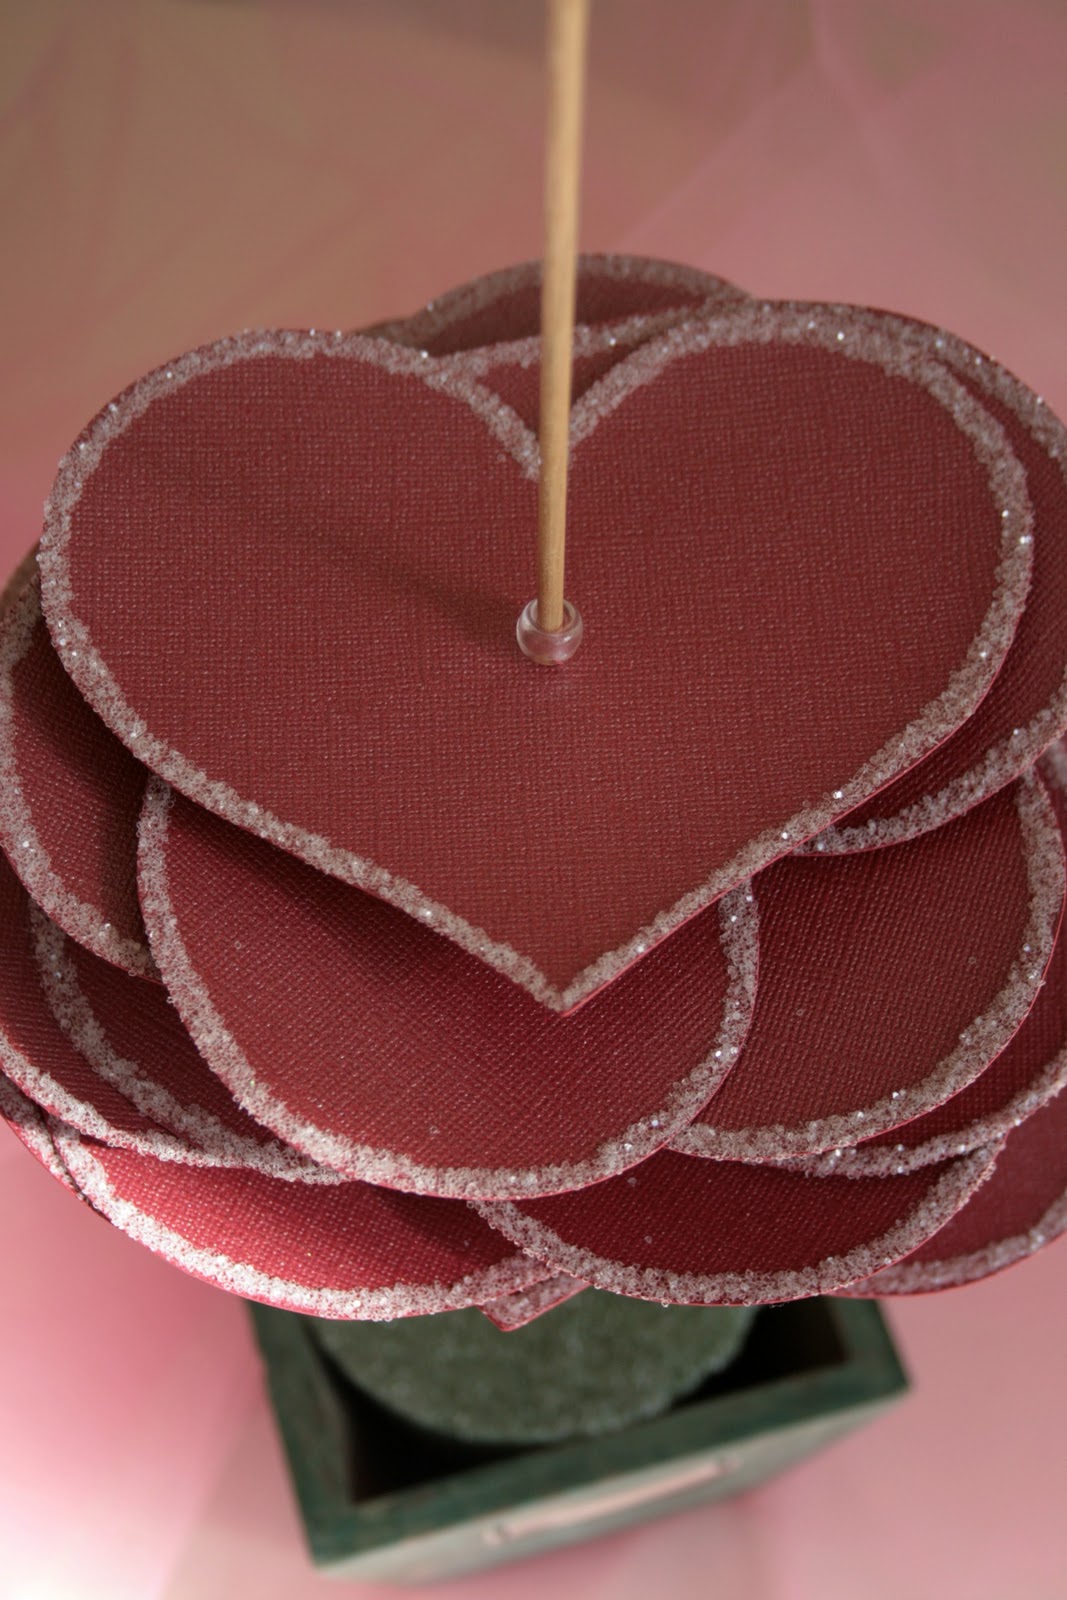
Next I made this matching topiary, using the same technique on the roses. 
I added strips of green tulle in the back of the rosettes for the look of leaves, and it added a delicate contrast. I'm not gonna lie, this little creation was hard to say goodbye to. 
Since the new little bundle of joy will be as "Cute as a Button", the guests each glued a button onto a "M" for baby Megan. 
The shower was open house style so we didn't play any of the traditional shower games, but this gave the guests something to work on for baby Megan's room.
Another little activity the guests were asked to do was with this Blessing Tree. They were asked to write some words of love, wisdom, or advice to Katie or baby Megan to hang on the tree. 
I made these puffy tulle pom poms as a simple garland to add detail to the gift table. 
They were SO easy, so keep your eyes open for an upcoming tutorial.
I LOVED the idea Katie came up with.  Like I mentioned before, it was open house style, but we wanted people to stay and chit chat, so Katie put together this onesie station. 

She bought a variety of onesie sizes, paint, and stencils and let everyone show off their creativity with personalized onesies from baby Megan's newest and greatest fans. 
It was such a cute idea to have the "artists" sign their names as a reminder of this fun day!
I also loved the holiday themed ones! I was a huge fan of this in lieu of games.
WARNING: Just looking at the rest of this blog post may cause cavities! 
Proceed at your own risk!  :)
"Sweets for the Sweet" was the theme of this candy bar.  Guests munched on candy and took a handmade paper box to go as a "thank you" for coming.
The boxes were made using the Cricut cartridge "Boxes, Bags, and Tags" (the first edition, not the "Boxes, Bags, Tags & More").  They are a really easy and custom DIY box for a variety of party favors.  I made the paper rosettes out of vellum which gave them a softer look.  Click HERE for a rosette tutorial.

The apothecary jars and smaller glass jars gave the candy bar an old time feel.
All of the candy was purchased at Gygi's, a super classy party supply store that has more than your average candy and baking selections.
One of my favorites were the giant pearlized gumballs.  ElleBee was sweet enough to let me use her gumball machines.  Click HERE for the tutorial she used to make them.
I got ahead of myself with the party favor, candy bar.  If you thought that was a sugar rush, get ready for the food, treats pure yumminess the guests indulged themselves on.
Katie's amazing neighbor, Rachel, baked all of these deliciously crazy treats!  A picture is worth a thousand words, so enjoy!

I know, right!?! 
 There was an insane amount of to-die-for food!
 These mini champagne styled glasses were one my favorites.  They came from our local Partyland.  The edges were dipped in Karo syrup and then dipped again in pink baking sugar from Gygi's.  The striped straws also came from Gygi's.  I told you, I'm kind of a fan!
Here I am with my gorgeous friend, Katie! (she's on the left)
It was so much fun planning this shower with her!  She will be an amazing mom, and I'm thrilled for her! 
I hope the next baby shower you throw is just as fun as this one!  Hopefully you got some good ideas you can use at any type of party to
make the world a cuter place! 

Have fun!
Cindy Jane
P.S. Click HERE to see some of Katie's baby announcement photos!

Sunday, January 29, 2012

Valentine's Day Topiary


For Christmas this year, I gave my friends and neighbors paper Christmas trees based off an idea I got here.  They were so much fun to give away that I wanted to make a Valentine's Day version.  They are super easy and fun to make!  Here's how you can do it too!


What you will need:
6 sheets of 12x12 cardstock
clear glue
glitter
1/8" wooden dowel or bamboo skewers
wood or metal container
floral foam base
moss
ribbon
pony beads
hot glue gun
heart & bird cartridge for a Cricut or SCAL
(I used the Cricut cartridges George & Basic Shapes for the heart and the Storybook cartridge for the bird.)

Step 1: Cut out 3 hearts each in sizes ranging from 1 & 1/2 inches to 6 & 1/2  inches in half inch increments.

Step 2: Glue around the edge of each heart and add glitter.


Step 3: Punch holes in the center of each heart. 


Step 4: Cut the dowel down to the height you want.  I cut mine to 17 inches.  Add the floral foam to the container and put the wooden dowel in the center.  Don't glue anything in place just in case you need to adjust later.

I got my container at Tai Pan for $4 and the foam at the Dollar Store.


Step 5: Stack the hearts on the dowel and place a pony bead after every heart to add height and dimension.  Keep going until you've used all of the hearts.  (I only put one 1 & 1/2 inch heart on the very top.)


Step 6: Your topiary should look like this.  There will be extra space between the hearts so gently press down and squish the hearts closer together. 


Step 7: When it looks good, take the dowel out of the foam and glue a pony bead underneath the first heart (on the bottom).  Then glue the dowel into the foam so about 4 or 5 inches of the dowel is showing. 


Step 8: Hot glue the moss to the foam base.


Step 9: Tie a ribbon and streamers to the top of the dowel and add the paper bird.


Finished! See I told you it was easy!  If you use bamboo skewers, like I did on the pink one, it will be a little shorter, but they are both cute!


Happy (early) Valentine's Day!

Have fun!

~ Cindy Jane