Monday, April 9, 2012

Weekend Pajama Party: Burlap Rose Lampshade

I have such a love/hate relationship with burlap!
I LOVE the look but HATE the mess!
I decided to "forgive-and-forget" for this lamp update and love, love, LOVE the way it all came together. I've had a set of lamps for about 7 years that I haven't used since I moved into my new house a few years ago and revamped my style. Anyway, I got ambitious on my 4 day weekend {the perks of being a teacher} and this is how it came together.

What I Used:
3 yards of natural colored burlap
hot glue/gun
repurposed lamp and shade
Krylon spray paint in Blue Ocean Breeze

Here's the "before" of the lamp. 
It's not too shabby, just a little too traditional for my house these days.
 First, I covered the cord and lamp structure with tin foil and spray painted it one of my favorite accent colors...Blue Ocean Breeze.
That was the easy part! 

Then, onto the burlap roses. 
I started by cutting 46-inch strips of burlap--this was the bolt width. 
{Click HERE for a tip on cutting burlap in straight lines.}
The strips varied in widths from 1 & 3/4 inches to about 2 & 1/2 inches.  I was able to make 3 roses out of each long strip of burlap. 
{Click HERE for directions on how to make the burlap roses.}

My lamp shade is about 11 inches tall and has a 36 inch diameter at its widest spot.  I made about 80 roses to cover it. 
If you want to make fewer roses {I recommend this!} I suggest cutting wider strips of burlap and making larger roses.
Gluing the roses on is the best part!
You'll need to cut off the "stems" of the roses so they will glue flat.
Another suggestion is to glue the roses around the top and bottom edges of the lampshade first. 
Then glue the remaining roses in.
I was so happy giddy when I glued in the last roses and put the lamp together. 
This project was totally worth the time and mess.  Plus, since I already had the lamp and spray paint, this project cost me less than 10 bucks! 
Even if you don't tackle burlap roses, I hope this project inspires you to repurpose something you love, but haven't used lately, to make your world a cuter place too!

Have fun!
~Cindy Jane

P.S.  Don't forget to "LIKE" us on Facebook! 
When we reach 100 "LIKES" we'll give away a
SUPER CUTE chunky necklace.
Click HERE for the details!

Friday, April 6, 2012

Speckled Butterfly Easter Eggs

It's not too late to make these beautiful eggs for your Easter dinner place settings or as a spring decoration.  They were inspired by a Martha Stewart creation but she used oversized paper egg boxes and hollowed chicken eggs.  I couldn't find the boxes and the idea of hollowing out eggs sounded like a giant mess waiting to happen. 
Luckily, I found an easier and cleaner way for about 50 cents an egg. 
Thank you Dollar Store!

Materials:
jumbo sized plastic eggs
cream spray paint
brown craft paint/toothbrush
butterfly cardstock

I found these jumbo sized eggs at The Dollar Store and they were the perfect size. :)
 I was worried the color would be too bright to cover, but I primed the eggs, then added a few coats of spray paint and it did the trick. 
***Do not use a prime and paint spray paint combo or the paint will run down.***
I put some light brown craft paint on an old toothbrush and speckled the eggs.

 Then I cut out some butterflies and Mod Podged them on.
Here's another option instead of speckling the eggs with paint.  I used a brown ink pad and sponge on this one.  I like the aged look the ink gives it.
I think they look really cute in these bowls with Spanish moss as a make-shift bird's nest. I added some simple name cards and my Easter dinner place settings are done.

 Happy Easter!
~ Cindy Jane
Don't forget to enter our giveaway HERE!


Sunday, March 25, 2012

Easter Wreath with Embellished Eggs

 Here's my last little craft for my corsage pin embellished eggs. I added them to a cute little ribbon wrapped wreath.  Here's how I did it!

Materials:
10 inch Styrofoam wreath
3 yards ribbon (1 & 1/2 inch width)
pussy willow silk flowers
heather silk flowers
hot glue gun
3 small Styrofoam eggs
corsage pins
glitter paper
Cricut 

Step 1:First I wrapped the wreath base with ribbon and then I pinned a loop of ribbon on the back for it to hang.
Step 2: I layed out the willows and heather around the wreath until I liked it.  Then I hot glued them in place.
Step 3: I made the eggs using Styrofoam eggs, corsage pins, and flowers from my A Walk in My Garden Cricut cartridge.  I used the "blossom" cut at 3/4 inches.  After the eggs were done, I hot glued them to a floral pick and stuck them into the wreath.
Step 4: A third egg wouldn't fit so I cut the top of one off, bedazzled it with flowers and pins, and attached it to the wreath.

Step 5: I added a lot of heather in and around the eggs to give it a nest look and it was finished!
And there you go! A spring wreath with a sparkly Easter touch!
(See, I told you Herbie's modeling days weren't over quite yet!)  :)
Have fun!
~Cindy Jane


P.S. Don't forget to enter our GIVEAWAY!!!!! See all the details HERE


Mini-Pin Easter Eggs


I can't decide if this post is to show off these cute eggs or the cutest bunny ever: Herbie.  My parents up and bought three bunnies last month and we are loving them! They are all so sweet and tame, so of course they had to have a photo shoot with my latest Easter creations. I see more modeling opportunities in Herbie's future.  :)

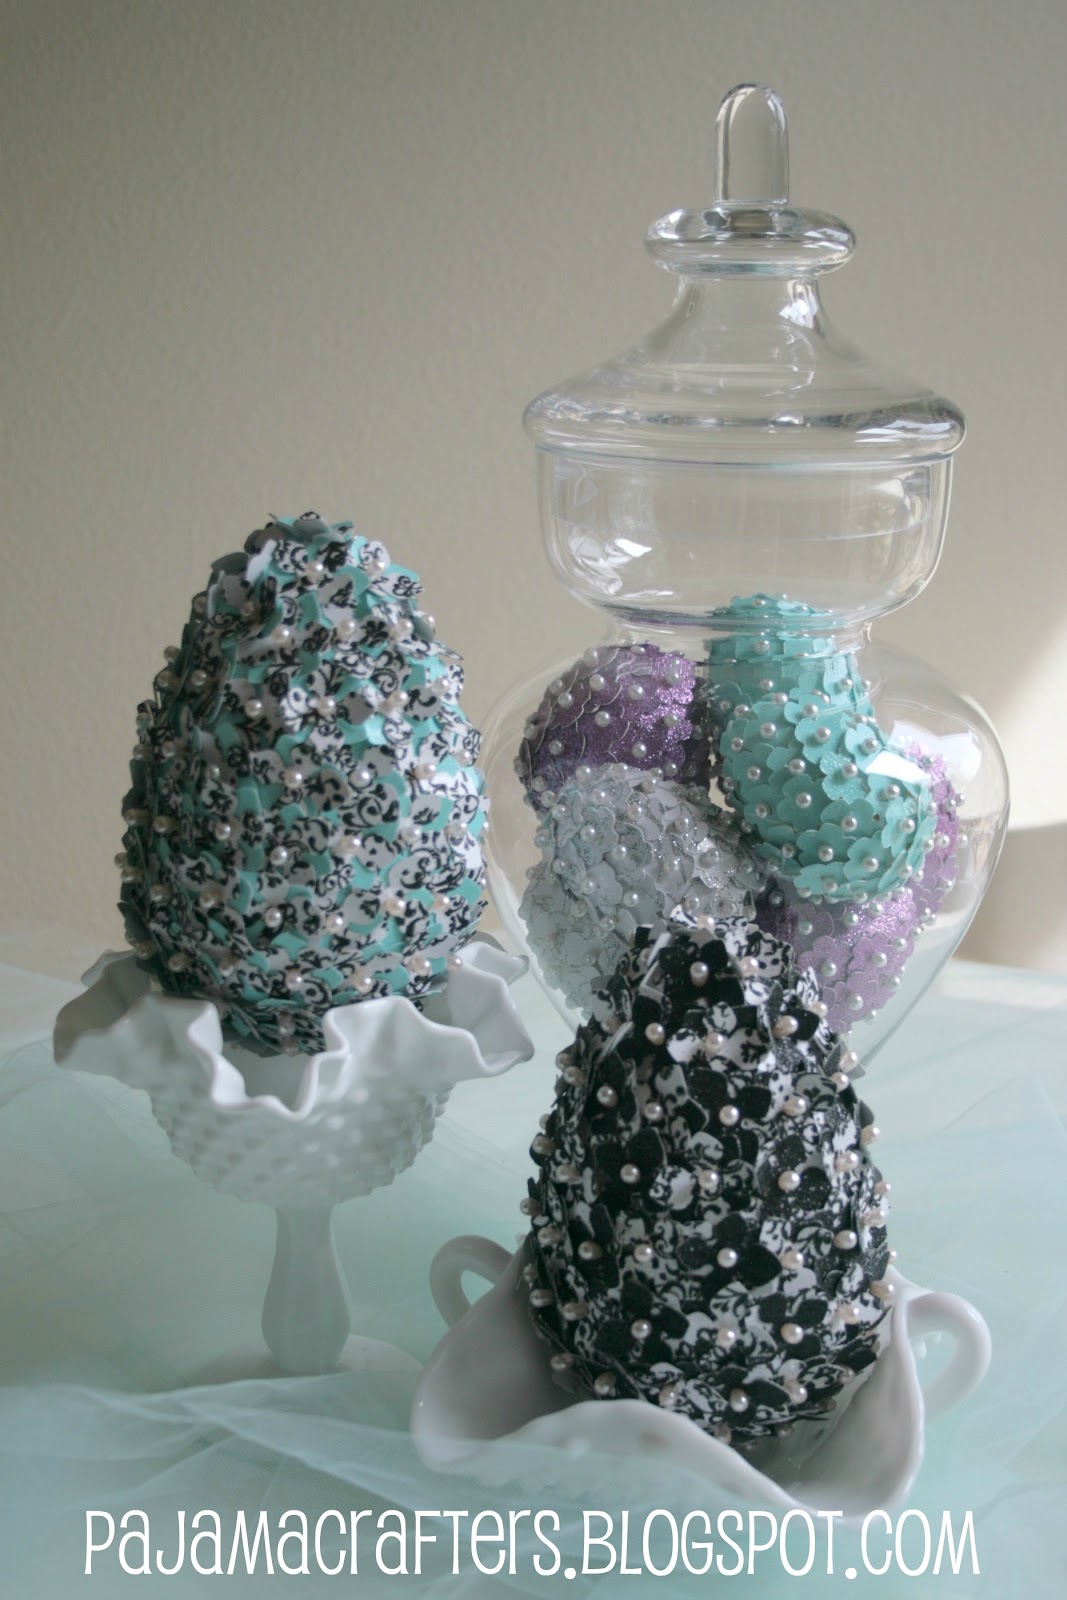
Okay, enough about bunny cuteness.  I have become obsessed with the Faberge Inspired Eggs I made last month.  When I say obsessesed, I don't use that word lightly.  I'm considering buying stock in glitter paper, styrofoam eggs, and corsage pins.  A fun alternative to the large eggs are to make mini ones and put them in apothecary jars or in bowls.
Do you love the Tiffany blue and damask patterns as much as I do? 
So pretty!

Another reason I am so excited about these mini-pin eggs is the killer deal I found at The Dollar Store.  I got this pack of four for $1.  I bought three packages (I didn't want to be greedy) and then went back 10 minutes later and bought the rest in the store (sometimes I'm greedy and have zero self control). 
I cut the flowers out of the Walk in My Garden Cricut cartridge.  I used the "blossom" petal and cut them out at 3/4 inches.  (I used about 70 flowers for each mini egg.) 
Another reason I love these colored eggs is you can match up the egg with the flowers and the styrofoam doesn't show through if you don't get the petals perfect every time.  
When you pin the flowers to the smaller eggs the pins will poke through depending on where you place them. I had to trim the pins down with wire cutters on some of them so they didn't come through the egg. If you do that, hold on tight to the pin and the bit you're trimming or the pin/piece you trim will shoot through the air.  Trust me, that's no fun!
 
Here's a close up of what they look like when they're done.
They look really cute displayed in a basket too.  :) 

Herbie's ego looks like it got a little bruised, but he was compensated with extra lettuce and carrots for his photo shoot.
(No animals were harmed in the making of this craft.)
There's still time to make some mini-eggs and decorate for Easter!  They are so much fun to make and you can display them so many ways to
make the world a cuter place!

Have fun!
~ Cindy Jane


P.S. Don't forget to enter our GIVEAWAY!!!! See all the details HERE


did I hear someone say GIVEAWAY???

    so............WHO WANTS ANOTHER GIVEWAY ????


Aren't these necklaces from Little Black Goose SO much fun?!?! They make a perfect photo prop for all the spring photo sessions. Just darling on little girls, or their mommas!

We had so much fun with our last giveaway that we thought we would do it again! 
When we hit 100 "likes" on our Facebook page we will give away a chunky necklace to one lucky winner! All you have to do is "like" us and share our Facebook page  with your Facebook friends. For an extra entry, "like" Little Black Goose's page as well! You can also tweet, pin us on Pinterest, email or whatever is easiest for you. Every way you share is worth an entry! Comment on our Facebook post or on this post to let us know that you shared! We will pick a random winner. EASY AS PIE! :) The share buttons are even at the bottom of the page!
GOOD LUCK! And may the odds be EVER in your favor!.... just had to slip that one in! :)

ElleBee


Monday, March 19, 2012

And the Winner Is.....

Congratulations to Megan! 
She is the winner of the Faberge Inspired Easter Egg!
Thanks to everyone who participated!  We're looking forward to more giveaways!

Friday, March 16, 2012

Shamrock Banner

You might need to put this cute little project on your "to do" list for next year, but better late than never, right? 
I'm not a huge St. Patty's Day decorator, but this little banner adds a fun touch.

What I used:
shamrock cookie cutter
1/2 yard flannel ~ but you should use felt :)
burlap string
Mod Podge
craft glue
 I got this cookie cutter at Ross for about $4.00.
I traced and cut out about 15 shamrocks.
 I had some sage colored burlap so I took threads off and used them to stitch around each shamrock. 
 I have a confession to make:  I get flannel, felt, and fleece confused!
I thought I was buying felt, but got flannel instead.  Oops!  It was really floppy
so I put Mod Podge on the back to stiffen it up. 
 It worked like a charm! 
(Iron-on interfacing would have also worked.)
 Then I stitched them all together and added some craft glue to the sides of the shamrocks to keep them all together. 
And there you have it!  I used Command hooks to hang the wreath to my mirror.  I don't have a ton of extra wall space so this is my new favorite trick.
Have a fabulous St. Patty's Day
I'll leave you with some Irish wisdom: "As you slide down the banister of life, may the splinters never point in the wrong direction."

Have fun!

~ Cindy Jane