Showing posts with label Tutorial. Show all posts

Saturday, August 4, 2012

Sugared Plumb Boutique Headband Tutorial YOU CAN DO THIS!

As promised- Here is the tutorial for the headband from the last post. It is not as hard as it looks! And I am going to list all my favorite places for supplies! These make fantastic baby shower gifts, and are very addicting! 

******If you are not the crafty type- this set (Headband and Necklace) has been donated to an auction benefitting the family of Amber Roussel, a mother who lost her life last week in a tragic car accident. You can view all of the items up for bid here. This necklace and Headband are here.

Our hearts go out to this family, and anyone who has experienced a loss such as this! Truly heartbreaking!******

If you want something similar to this, feel free to message me at Little Black Goose

Okay PJ Crafters- HERE WE GO!


Supplies:

*6"x18" Strip of synthetic fabric of your choice (I am using fabric from Joann's Project Runway collection from last spring- but any will do- as long as it melts when exposed to heat)

*French Netting- Joann's (Usually found with the bridal trims)

*Ribbon- Hobby Lobby has a great selection! Including velvet ribbons, which I love!

*Rhinestone embellishments- Simply Sassy Source One of the best places I have found for these. Huge selection and very reasonable prices!

*Feathers- most craft stores. Mine is a piece of a feather boa.

*Fold Over Elastic- Bitsybands.com

*Pearls- I think these were from Ross, but any craft store carries these little embellishments.

*Tulle- Hobby Lobby

*Scrap of felt

*Glue Gun


 Step 1

Cut your strip of fabric into thirds so that you have three 6x6 inch squares. Round the corners a bit so that they are somewhat circular. THIS DOES NOT NEED TO BE PERFECT! A little variation adds to the flowers character. 
Next, cut slits in the fabric towards the center so that you have "petals".


Step 2:

CAREFULLY run the edges of the flower over a flame to melt them and give the effect of "petals". This will also seal them so that they won't fray. Be careful not to touch the parts that have melted. They take a few seconds to cool, and can be extremely hot!


Stack your petals like this:
I scrunched the top petal up a bit for texture.

I also added some tulle between the middle and bottom layer to give it some body.


Carefully glue the layers together with your glue gun.


 Step 3:
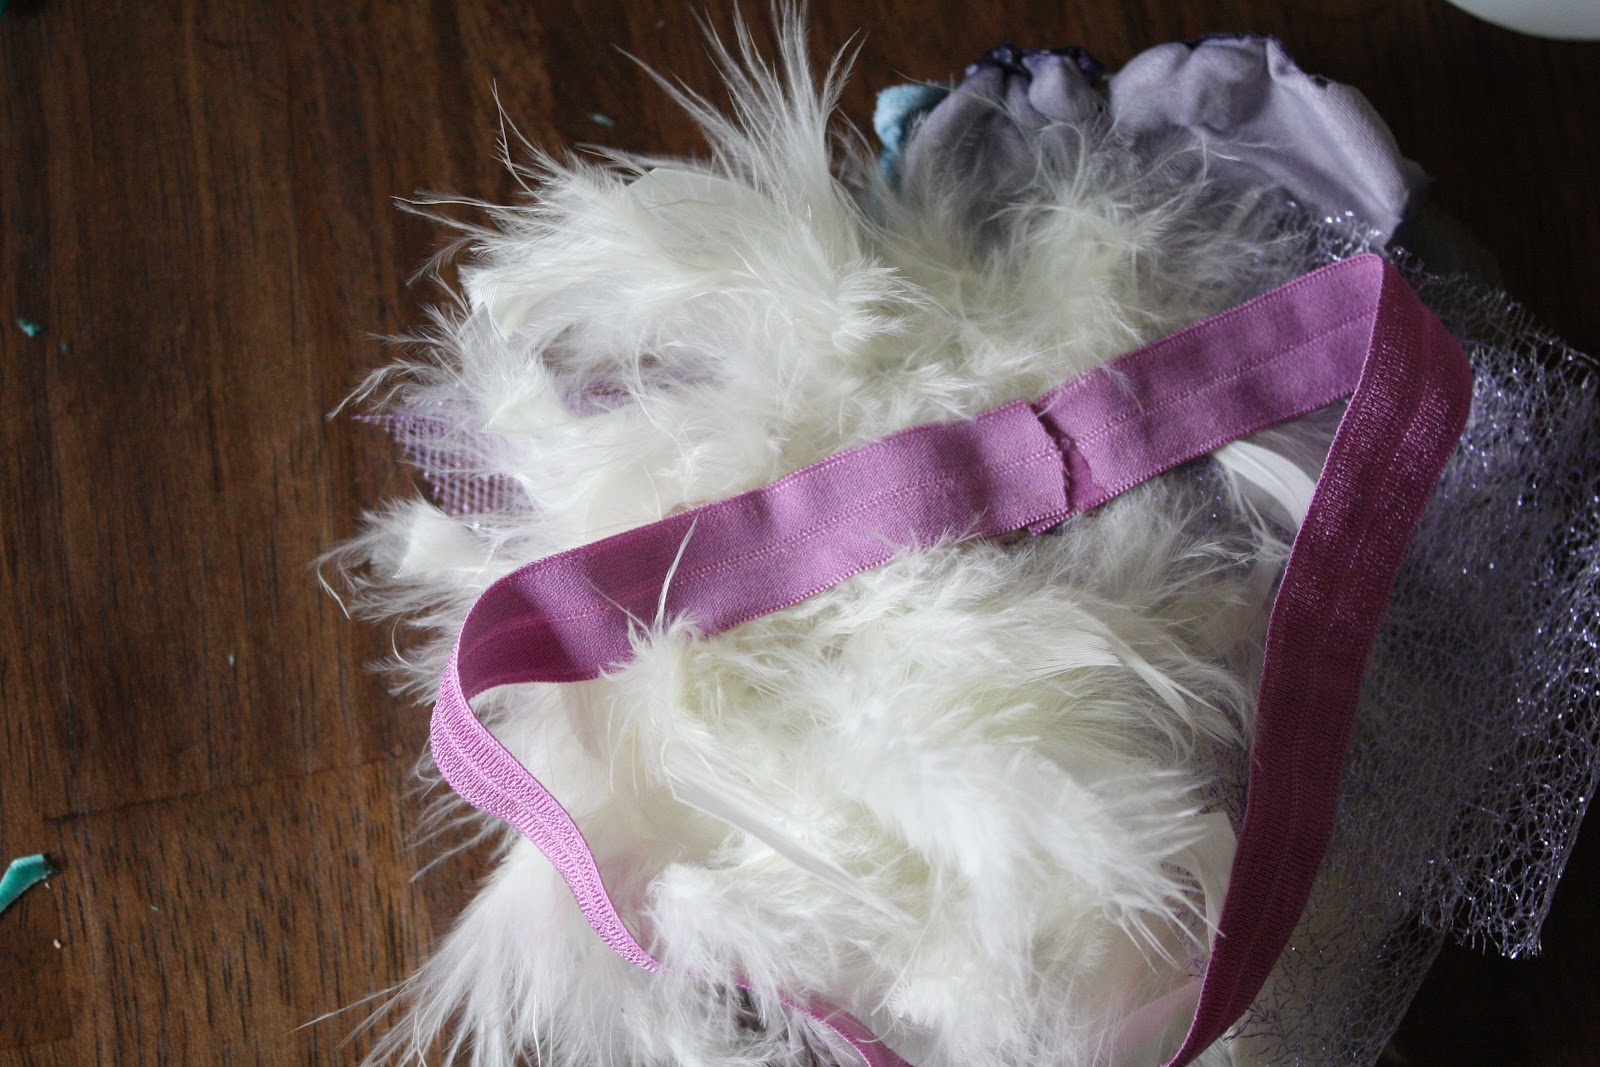
Cut a piece of the feather boa and fold it in half. glue your flower onto the boa. Use plenty of glue, and be careful not to burn yourself!


I had some glittery netting in my stash, so I cut some strips for embellishment, but this is optional and could be done with ribbon or whatever you like. I folded my strips in half and glued them to the back of the flower.


I also tucked another little piece of netting between the flower and the feathers.


Step 4:
The Velvet Bow.

Cut a 7", 5 1/2" and two 6" pieces of ribbon. Cut the 6" pieces into a "v" on the end and run them over a flame to heat seal them so they don't fray.

Fold the other two pieces in half and secure the ends with glue.
Stack them and glue them together.


Cut the other pieces in half and glue them to the under side of your bow.


Attach your fold over elastic headband to the back of the flower and secure with glue. 


You can fancy up the front any way you like. You can do a big rhinestone center, or a cluster of pearls. Both very simple pretty options. I chose to get a piece of French Netting and tie the center with some sparkly glitter ribbon. I glued that down and then added a rhinestone embellishment, clusters of pearls, and a little bow.


Glue your velvet bow (topped in the center with another rhinestone embellishment) next to the flower, and cover the back with a piece of felt to give it a finished look and add strength.
Trim anything that looks like it needs trimming, and viola! You are finished!!!!


If you try this craft, we would LOVE to see your creations! Please share a photo on our Facebook Page! Isn't it fun to inspire each other?

Happy Crafting!!!

XO~ Laura


Sunday, January 29, 2012

Valentine's Day Topiary


For Christmas this year, I gave my friends and neighbors paper Christmas trees based off an idea I got here.  They were so much fun to give away that I wanted to make a Valentine's Day version.  They are super easy and fun to make!  Here's how you can do it too!


What you will need:
6 sheets of 12x12 cardstock
clear glue
glitter
1/8" wooden dowel or bamboo skewers
wood or metal container
floral foam base
moss
ribbon
pony beads
hot glue gun
heart & bird cartridge for a Cricut or SCAL
(I used the Cricut cartridges George & Basic Shapes for the heart and the Storybook cartridge for the bird.)

Step 1: Cut out 3 hearts each in sizes ranging from 1 & 1/2 inches to 6 & 1/2  inches in half inch increments.

Step 2: Glue around the edge of each heart and add glitter.


Step 3: Punch holes in the center of each heart. 


Step 4: Cut the dowel down to the height you want.  I cut mine to 17 inches.  Add the floral foam to the container and put the wooden dowel in the center.  Don't glue anything in place just in case you need to adjust later.

I got my container at Tai Pan for $4 and the foam at the Dollar Store.


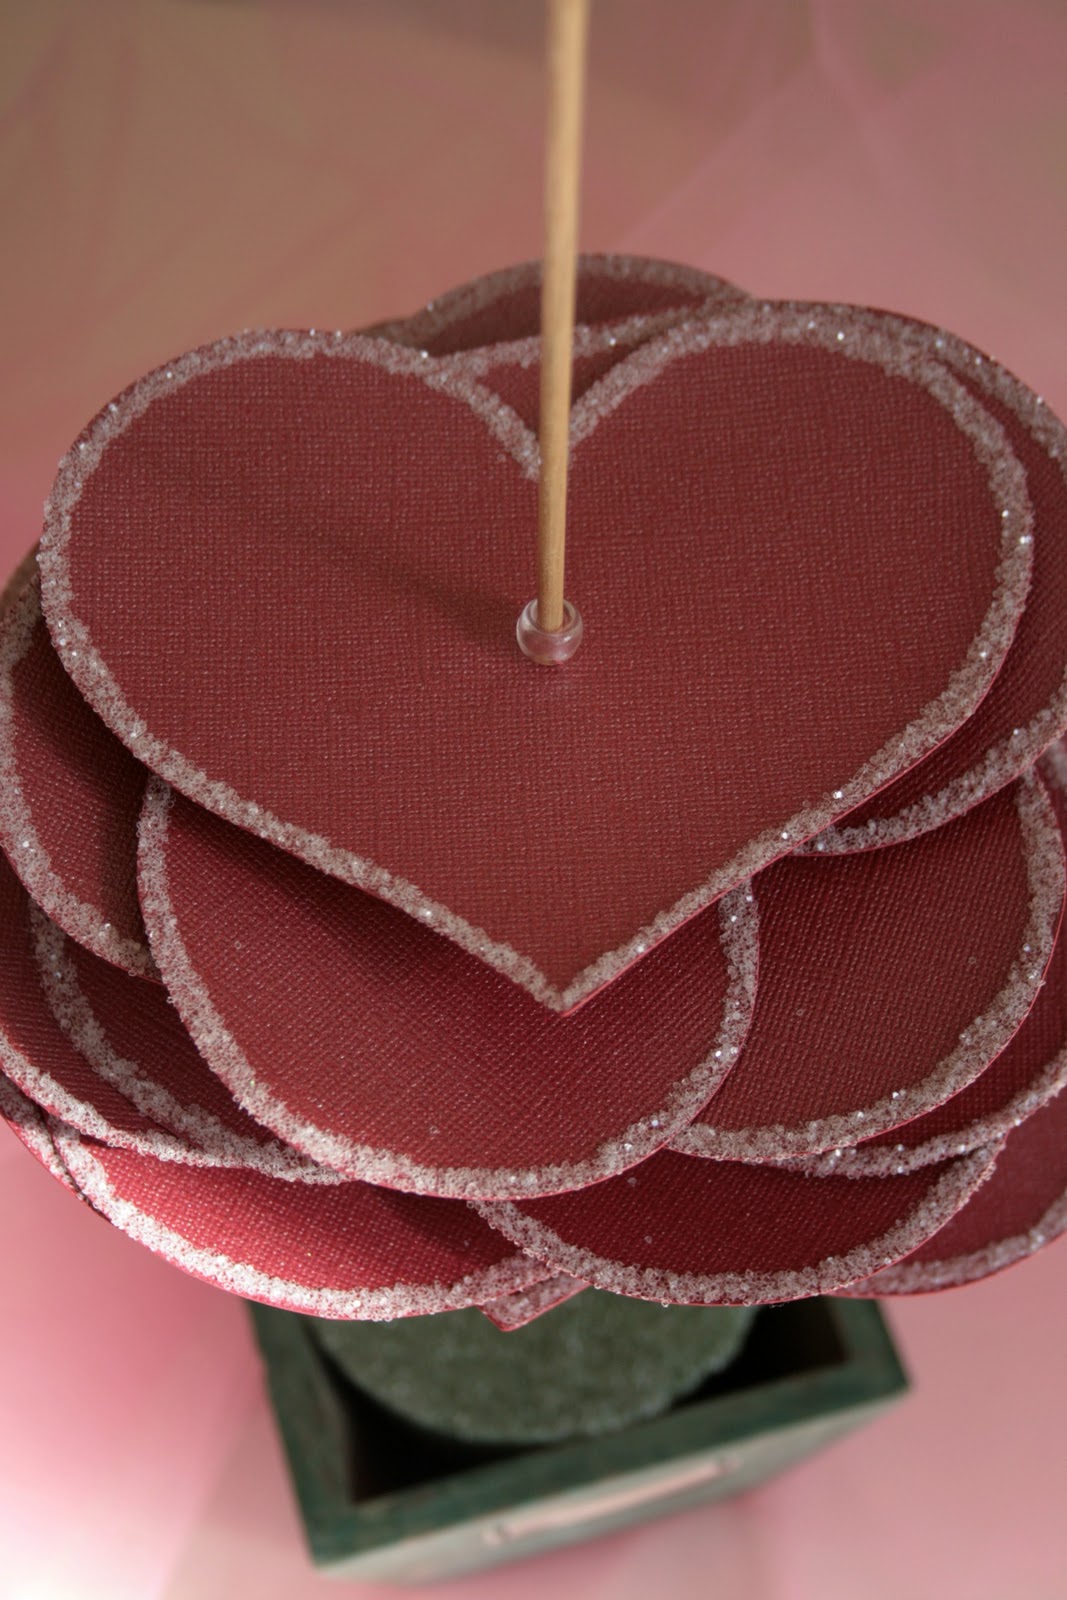
Step 5: Stack the hearts on the dowel and place a pony bead after every heart to add height and dimension.  Keep going until you've used all of the hearts.  (I only put one 1 & 1/2 inch heart on the very top.)


Step 6: Your topiary should look like this.  There will be extra space between the hearts so gently press down and squish the hearts closer together. 


Step 7: When it looks good, take the dowel out of the foam and glue a pony bead underneath the first heart (on the bottom).  Then glue the dowel into the foam so about 4 or 5 inches of the dowel is showing. 


Step 8: Hot glue the moss to the foam base.


Step 9: Tie a ribbon and streamers to the top of the dowel and add the paper bird.


Finished! See I told you it was easy!  If you use bamboo skewers, like I did on the pink one, it will be a little shorter, but they are both cute!


Happy (early) Valentine's Day!

Have fun!

~ Cindy Jane

Saturday, January 28, 2012

Ruffled Minky Blanket Tutorial


 Minky is such a soft comfy fabric- It makes the best blankets! It is not, however, the easiest material to work with. If you follow a few simple rules, you can do it with great results!!! After lots of trial and error- here are my methods:
Supplies:
1 yard of cotton fabric for the body of the blanket
1 yard (or more, if you want it more ruffly) for the ruffle
1 yard of minky fabric for the back
Sewing machine
Iron

1. Wash and dry your cotton fabric. It will shrink up a bit, and the minky doesn't shrink. It is important to pre-wash the cotton to avoid a wrinkly underside  when you finish!

Cut your ruffle fabric into 5" strips. to get these strips nice and straight- I cut a 1 or 2 inch slit and rip the fabric. It will rip straight.
 2. Sew the strips together end to end to make one giant strip. Fold the strip (length-wise) and iron a crease all the way down the center of your ruffle.
 The minky fabric can be expensive. Hobby Lobby sells a pretty good selection of colors for $12.99/yard- so if you use their 40% coupon (located on their website most weeks. Every once in a while they don't offer that coupon- but if you wait a week you can bet it will be back).

3. The minky fabric is 60" wide- you can get two 30" by 36" pieces out of each yard. I think this makes the perfect blanket size. This makes your blankets very affordable (if you use the coupon). Only about $4 in minky fabric per blanket!
Once you have cut your minky in half it is time to trim the cotton. One side of your fabric (the 36" side) should match up in size pretty closely. You will have around eight inches of overhang on the other side of your cotton. Trim this strip off and use it later for burp cloths, hair bows, bibs, etc. A nice little addition to a gift!

 4. It is time to sew your ruffle onto the front of your blanket. Your ruffle should be folded in half with the right sides out. Line up the raw edges of the ruffle and the blanket top, and position your presser foot to leave a two or three inch tail.
 4. About every four inches you can make (approximately) a one inch pleat. Alternate the directions of the pleat as you go. Continue until you approach the first corner.
 5. When you reach the corner you want to give yourself plenty of fabric to work with. When the blanket is opened up it will spread the ruffle out and you will need the extra. Carefully stitch slowly around the corner- making the ruffle as full as you can.
 Continue until you have gone around the entire top of the blanket.

6. When you get to the end- guess about how much fabric you will need on your ruffle to make one more pleat- and trim the excess.
You will then want to sew the two ends of the ruffle together. Open up the ruffles and put the right sides together and sew. Make your final pleat and finish attaching the ruffle.

 This is how your top should look now.
 7. Lay your top out- right side up, and ruffles going towards the inside of the blanket. Make sure the blanket is completely flat- with no wrinkles.


 8. Now it is time to attach the minky fabric.
Lay the minky fabric (right side down) on top of the cotton fabric. Again- make sure there are no wrinkles and everything is nice and flat. This is where things can get a little tricky, so take your time!
 9. Once it is all laid out pin pin and pin some more!!! This is such an important step! This is what keeps it from ending up a wrinkled, stretched out mess!
Pin your corners first, and then pin the center of each side. Then another pin in between the center and corner pins, etc. etc. until you have pins all the way around- no more than about 2" separating each one. I can't stress enough how important this is!
10. Carefully begin sewing around the blanket, removing the pins as you go. Make sure your minky is on the top, and the cotton is on the bottom. Take care not to stretch the minky at all as you go. it needs to stay flat or your blanket will be totally wonky (that is a very accurate description!) when you are done! Also, be careful that all your ruffles inside the blanket stay flat, and you don't catch them in a stitch. 
11. Leave a 4" opening so you can pull your blanket right side out. Go ahead and turn it right side out and check to make sure all the ruffles are securely sewn into the blanket and everything looks as it should. Now is the time to fix anything that may not be perfect.

 12. Turn the blanket inside-out again and trim all the excess fabric around the edges. Take care not to cut your stitch!

 Flip the blanket right side out again and get ready to top stitch.

13. When I do the top stitch, I do it with the cotton on top. Start your top-stitch at the 4"opening and stitch it closed. Continue your stitch all the way around the blanket. Pull gently on your ruffle periodically to make sure it stays nice and flat on both sides.


Cut off any loose strings- and that's that!

These are my favorite blankets! They fold up small enough to go in the diaper bag- but are big enough to use as your baby grows. And they get softer with each wash. My four year old has blankets as old as he is- and they look just as good as the first day we used them!

The perfect pajama craft- and I think all this talk of blankies made me sleepy! Night Night!

ElleBee